So far we have only been
working with the visible wavelengths, that is the parts of the
electromagnetic spectrum that is visible to the human eye. Try changing
the band combination to 10 (shortwave infrared), 8 and 7 (both near
infrareds). Use the equalise button ![]() ,
but this time follow this by pressing the window raster
re-enhancement button
,
but this time follow this by pressing the window raster
re-enhancement button ![]() .
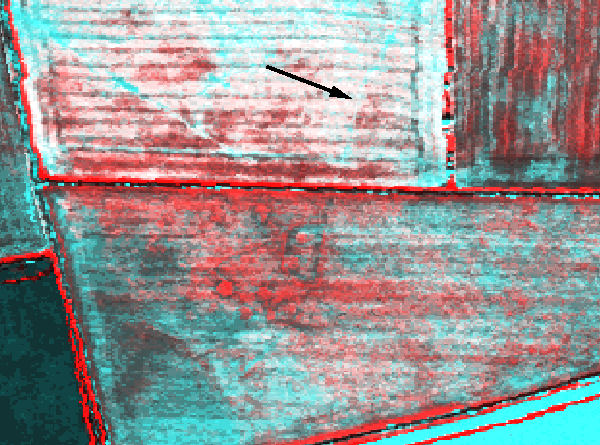
This should produce an image looking something like the one below. The
window raster re- enhancement recalculates the results of the last
enhancement based on the values of the pixels currently visible on
screen. This has the effect of providing a slightly smoother, less
garish image. Note that the infrared bands have detected a further
linear feature in the upper field.
.
This should produce an image looking something like the one below. The
window raster re- enhancement recalculates the results of the last
enhancement based on the values of the pixels currently visible on
screen. This has the effect of providing a slightly smoother, less
garish image. Note that the infrared bands have detected a further
linear feature in the upper field.
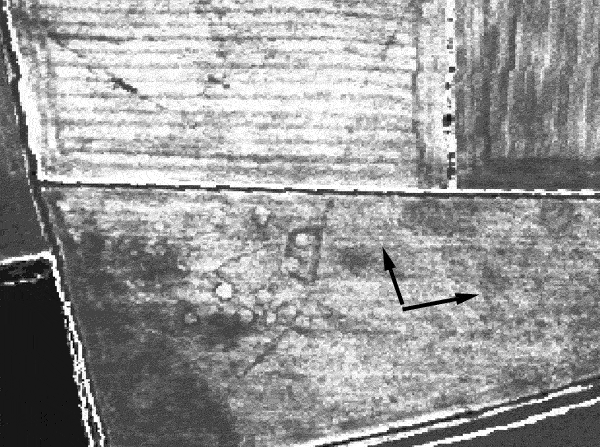
You may wish to see the returns from a single band only. To do this, change all of the bands in the raster source dialogue to 10 (clicking on the greyscale lock button near the bottom of the dialogue will also do this, changing all three bands to whatever band number is in the upper window). Now perform an equalise followed by a windows raster re-enhancement. You should now see an image looking similar to the one below. The arrows are pointing to a large (left) and small (upper) circle, anomalies which are not detected in the other bandwidths. You may need to look for some time to identify these features, as they are not as clear as the more obvious anomalies on the left.
Now its time for you to try some further examples on your own.